
Plastic part design optimization plays a critical role in ensuring that the final product not only meets functional requirements but also achieves the best possible quality at the lowest cost. A poorly designed part can lead to defects such as warping, sink marks, or even structural failure, while an optimized design ensures smooth production, shorter cycle times, and fewer material wastages. Whether you’re designing a simple bottle cap or a sophisticated electronic enclosure, understanding key design principles can make all the difference.
Key Principles of Plastic Part Design Optimization

When it comes to designing plastic parts for injection molding, there are several key principles that must be considered to ensure the part is both functional and manufacturable. These principles not only help in avoiding common defects but also contribute to reducing costs and improving production efficiency. Below are some fundamental aspects of plastic part design optimization:
1. Wall Thickness Considerations
- Uniformity: Maintaining consistent wall thickness throughout the part is crucial. Variations in thickness can lead to issues such as warping (distortion caused by uneven cooling) and sink marks (surface depressions).
- Optimal Thickness: The ideal wall thickness depends on the material being used and the size of the part. Thicker walls increase cycle times and material usage, while excessively thin walls may compromise structural integrity.
- Ribbing for Strength: Instead of increasing wall thickness for strength, ribs can be added to reinforce the structure without adding unnecessary weight or material.
2. Draft Angles
- Definition: Draft angles refer to the slight tapering of surfaces parallel to the mold’s opening direction. This helps in smoothly ejecting the part from the mold after cooling.
- Recommended Values: A draft angle of at least 1° to 3° is typically recommended, depending on the material and surface finish. For textured surfaces, higher draft angles may be necessary to prevent damage during ejection.
- Benefits: Proper draft angles reduce friction, minimize cosmetic defects like drag marks, and improve overall part quality.
3. Radii and Corners
- Avoiding Sharp Edges: Sharp internal and external corners should be avoided as they create stress concentrations, making the part more prone to cracking under load.
- Fillets and Rounded Corners: Incorporating radii (rounded edges) distributes stress evenly across the part, enhancing durability and preventing fractures. Internal radii also facilitate better material flow during injection.
- Recommended Radius: As a rule of thumb, the radius should be approximately half the wall thickness for internal corners and equal to or greater than the wall thickness for external corners.
4. Ribs and Bosses
- Ribs:
- Ribs are narrow protrusions added to the part to increase stiffness and strength without significantly increasing wall thickness.
- Proper rib design involves keeping their thickness less than 60% of the adjacent wall thickness to avoid sink marks.
- Spacing between ribs should allow for adequate material flow and cooling.
- Bosses:
- Bosses are cylindrical projections used for mounting screws or other components.
- To prevent sink marks, bosses should have thinner walls compared to the surrounding areas and include supporting ribs if necessary.
5. Gates and Vents
- Gate Placement: Gates are the entry points where molten plastic enters the mold cavity. Strategic placement ensures uniform filling and minimizes cosmetic defects like weld lines.
- Vents: Small channels called vents are included to allow air trapped inside the mold to escape during the injection process. Without proper venting, air pockets can cause voids or burn marks on the part.
6. Material Flow and Shrinkage
- Flow Path Optimization: The design should facilitate smooth material flow by minimizing abrupt changes in geometry. This reduces the risk of incomplete fills or weak spots.
- Shrinkage Compensation: Different plastics shrink at varying rates as they cool. Accounting for this shrinkage during design ensures the final part matches the intended dimensions.
By adhering to these key principles, designers can create plastic parts that are not only structurally sound but also easy to manufacture.
Common Design Mistakes to Avoid

Even with a solid understanding of the principles of plastic part design optimization, mistakes can still occur if certain pitfalls are not carefully avoided. Below are some of the most common design errors that can lead to defects, increased costs, or production delays in injection molding.
1. Inconsistent Wall Thickness
- Issue: Parts with varying wall thicknesses can cause uneven cooling rates, leading to problems such as warping (distortion), sink marks (surface depressions), and voids (air pockets inside the part).
- Impact: These defects not only affect the appearance but also compromise the structural integrity of the part.
- Solution: Maintain uniform wall thickness wherever possible. If transitions between thick and thin sections are necessary, use gradual tapers or fillets to facilitate even cooling.
2. Insufficient Draft Angles
- Issue: Neglecting draft angles can make it difficult to eject the part from the mold, potentially causing damage to the surface or edges during demolding.
- Impact: This can result in cosmetic defects like drag marks, scratches, or even cracking.
- Solution: Always incorporate sufficient draft angles (typically 1° to 3°) on all vertical surfaces parallel to the mold’s opening direction. For textured surfaces, increase the draft angle further to compensate for friction.
3. Sharp Edges and Corners
- Issue: Sharp internal and external corners create stress concentrations, making the part more susceptible to cracking or breaking under load.
- Impact: Stress cracks may appear during use, reducing the lifespan of the part.
- Solution: Use radii (rounded corners) to distribute stress evenly. Internal radii should be at least half the wall thickness, while external radii should match or exceed the wall thickness.
4. Overusing Material
- Issue: Excessive material usage increases both the weight and cost of the part, while also extending cycle times due to longer cooling periods.
- Impact: Higher material costs and slower production speeds reduce profitability.
- Solution: Optimize the design by incorporating features like ribs, bosses, and honeycomb structures to maintain strength without adding unnecessary material.
5. Poor Gate Placement
- Issue: Improper placement of gates (the entry points for molten plastic) can lead to incomplete fills, weld lines, or cosmetic defects.
- Impact: Weld lines weaken the part, while incomplete fills result in rejected parts and wasted resources.
- Solution: Place gates strategically to ensure uniform filling and minimize flow-related issues. Consider using multiple gates for larger or more complex parts.
6. Ignoring Shrinkage Compensation
- Issue: Different plastics shrink at varying rates as they cool. Failing to account for this shrinkage can lead to dimensional inaccuracies.
- Impact: The final part may not meet the required specifications, affecting fit and functionality.
- Solution: Consult material datasheets for shrinkage rates and adjust the mold design accordingly to ensure accurate dimensions.
7. Lack of Venting
- Issue: Air trapped inside the mold cavity during injection can cause burn marks, voids, or incomplete fills.
- Impact: These defects degrade the quality of the part and increase scrap rates.
- Solution: Incorporate vents into the mold design to allow trapped air to escape efficiently. Ensure vents are properly sized and located near areas where air is likely to accumulate.
8. Underestimating Moldability Challenges
- Issue: Complex geometries or intricate details can pose significant challenges during molding, such as poor material flow or difficulty in ejection.
- Impact: This can lead to higher reject rates, longer cycle times, and increased production costs.
- Solution: Simplify the geometry whenever possible and collaborate closely with mold makers to identify potential moldability issues early in the design phase.
By avoiding these common design mistakes, you can significantly improve the manufacturability, quality, and cost-effectiveness of your plastic parts. Remember, a well-designed part not only meets functional requirements but also aligns with the capabilities of the injection molding process.
Advanced Techniques for Optimization

While adhering to fundamental design principles is essential, advanced techniques can further enhance the efficiency, quality, and performance of plastic parts in injection molding. These methods leverage modern tools, materials, and processes to push the boundaries of what’s possible in part design. Below are some cutting-edge strategies for optimizing plastic part designs.
1. Simulation Tools
- Purpose: Simulation software like Moldflow, ANSYS, or Autodesk Moldflow Insight allows designers to predict how molten plastic will behave during the injection molding process.
- Applications:
- Identify potential issues such as flow patterns, pressure distribution, and cooling rates before production begins.
- Optimize gate placement, runner systems, and venting for better material flow and reduced defects.
- Benefits:
- Reduces trial-and-error cycles, saving time and costs.
- Ensures high-quality results by addressing problems early in the design phase.
2. Gate Placement
- Optimizing Flow: Proper gate placement ensures uniform filling of the mold cavity, minimizing defects like weld lines, sink marks, and voids.
- Multi-Gate Systems: For larger or more complex parts, using multiple gates can improve material distribution and reduce cycle times.
- Subsurface Gates: Hidden or subsurface gates eliminate visible gate marks on the finished part, enhancing aesthetics.
- Hot Runner Systems: These systems keep the material molten until it enters the mold cavity, improving consistency and reducing waste.
3. Material Selection
- Tailored Materials: Choosing the right polymer based on the application requirements is critical for achieving optimal performance.
- High-Strength Applications: Use reinforced materials like glass-filled nylon or carbon fiber composites.
- Aesthetic Requirements: Select materials with good surface finishes or colorability.
- Environmental Conditions: Consider factors like temperature resistance, UV stability, and chemical exposure when selecting materials.
- Recycled Materials: Incorporating recycled plastics can reduce costs and environmental impact while maintaining acceptable performance levels.
4. Texturing and Surface Finishing
- Enhancing Aesthetics: Textured surfaces can hide minor imperfections and add visual appeal to the part.
- Functional Benefits: Certain textures improve grip, reduce glare, or provide anti-slip properties.
- Design Considerations:
- Increase draft angles for textured surfaces to ensure smooth ejection.
- Avoid deep textures that could trap air or make cleaning difficult.
5. Lightweighting Techniques
- Hollow Sections: Design parts with hollow sections or internal cavities to reduce weight without compromising strength.
- Lattice Structures: Use lattice or honeycomb structures for added rigidity while minimizing material usage.
- Thermal Management: Lightweight designs often require improved thermal management to prevent overheating in applications like electronics housings.
6. Modular Design
- Interchangeable Components: Design parts with modular components that can be reused across different products or projects.
- Tooling Efficiency: Standardized components reduce the need for custom molds, lowering tooling costs and speeding up production.
- Scalability: Modular designs allow for easier scaling of production volumes or adapting to changing customer needs.
7. Additive Manufacturing for Prototyping
- Rapid Iteration: Use 3D printing to create prototypes quickly and test design concepts before committing to full-scale injection molding.
- Cost Savings: Identify and resolve design flaws early in the prototyping stage, avoiding costly changes during mass production.
8. Multi-Material Injection Molding
- Dual-Shot Molding: Combine two or more materials in a single part to achieve specific properties (e.g., soft-touch grips on hard shells).
- Bonding Techniques: Ensure proper adhesion between different materials by selecting compatible polymers or incorporating mechanical interlocks.
- Applications: Ideal for consumer goods, medical devices, and automotive components requiring diverse material characteristics.
Cost-Saving Strategies Through Design
Designing plastic parts for injection molding isn’t just about functionality and quality—it’s also an opportunity to reduce costs. By making smart design choices, you can lower material usage, shorten cycle times, and minimize production complexities. Below are some cost-saving strategies that focus on optimizing the design phase.
1. Simplify Geometry
- Complexity Costs: Complex geometries often require more intricate molds, which increase tooling costs and production challenges.
- Streamlined Designs: Simplifying part geometry reduces mold complexity, lowers tooling expenses, and improves manufacturability.
- Example: Replace unnecessary curves or undercuts with straight lines or slight tapers where possible.
2. Standardize Components
- Reusable Molds: Design components that can be reused across multiple products or projects, reducing the need for custom molds.
- Modular Approach: Use standardized features such as screw bosses, snap-fit joints, or ribs that can be adapted to various applications.
- Benefits: Lower tooling costs, faster setup times, and easier scalability.
3. Optimize Wall Thickness
- Material Savings: Thicker walls use more material, increasing both material costs and cooling times.
- Right-sizing Walls: Ensure wall thickness is optimized for strength and function without being unnecessarily thick.
- Ribs and Reinforcements: Add ribs instead of increasing wall thickness to maintain structural integrity while saving material.
4. Minimize Material Usage
- Lightweighting: Reduce the amount of material used by incorporating hollow sections, lattice structures, or honeycomb designs.
- Hollow Cores: For solid parts, consider designing them with hollow cores to save material without compromising strength.
- Example: A bottle cap with a hollow center uses significantly less material than a fully solid one.
5. Shorten Cycle Times
- Efficient Cooling: Properly designed parts cool faster, reducing cycle times and increasing throughput.
- Uniform Wall Thickness: Consistent wall thickness ensures even cooling, avoiding delays caused by uneven shrinkage.
- Optimized Gates and Runners: Efficient gate placement and runner systems ensure rapid filling and minimal waste, further speeding up the process.
By implementing these cost-saving strategies through thoughtful design, you can achieve significant financial benefits without sacrificing quality or functionality.
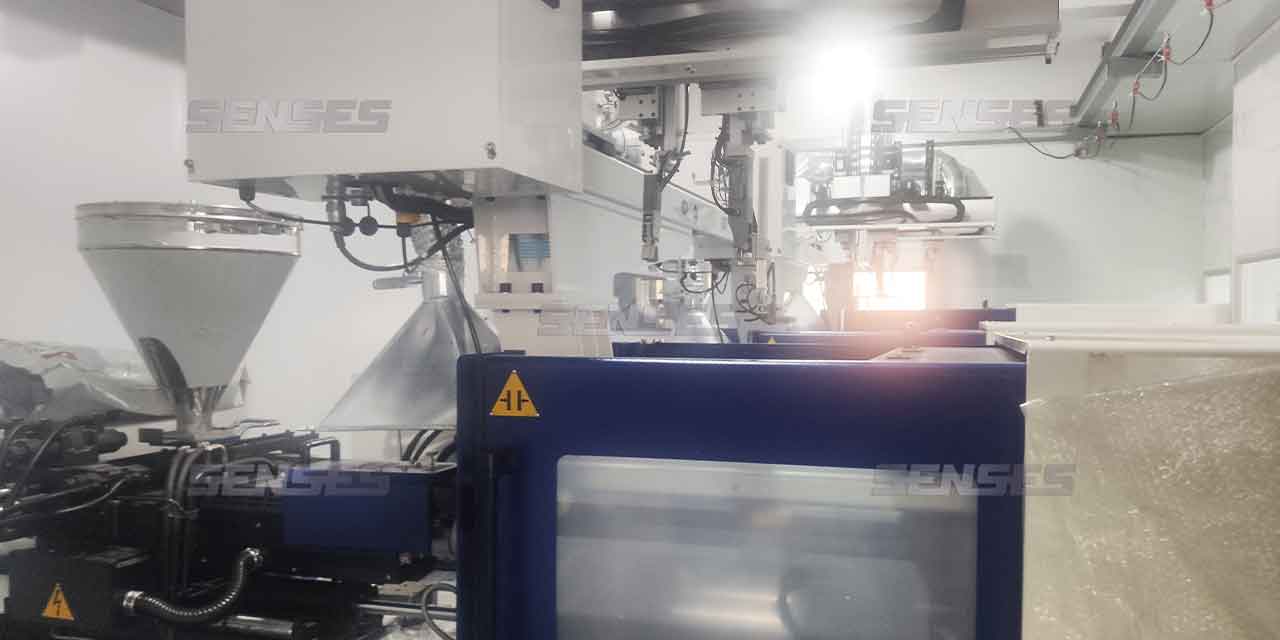
Senses: Your Partner in Injection Molding Solutions
Senses is an ISO 9001:2015 certified plastic injection molding company, offering a comprehensive array of services including mold and part design, prototyping, small-batch production, and full-scale manufacturing. We serve a diverse range of industries, encompassing automotive, medical, and consumer electronics. Our focus is on ensuring each product we deliver meets the highest standards of quality and functionality.
For personalized solutions and expert consultation, reach out to us today at info@senseschina.com.


